

How To Set Jdk Path In Spring Tool Suite
Bound WS - Surroundings Setup
In this Affiliate, we will empathize the process of setting up Jump-WS on Windows and Linux based systems. The Spring-WS can be easily installed and integrated with your current Java environment and MAVEN by following a few unproblematic steps without whatever complex setup procedures. User administration is required while installation.
System Requirements
The following table lists out the organisation requirements, while the subsequent steps volition guide u.s.a. through the environment setup procedure.
| JDK | Coffee SE ii JDK one.5 or to a higher place |
| Memory | 1 GB RAM (recommended) |
| Deejay Space | No minimum requirement |
| Operating Arrangement Version | Windows XP or above, Linux |
Let us now proceed with the steps to install Bound-WS.
Step ane: Verify the Java Installation
To brainstorm with, you demand to have Java Software Development Kit (SDK) installed on your organisation. To verify this, execute any of the post-obit two commands depending on the platform y'all are working on.
If the Java installation has been washed properly, then it volition brandish the current version and specification of your Java installation. A sample output is given in the post-obit table.
| Platform | Control | Sample Output |
|---|---|---|
| Windows | Open command console and type − \>java -version | Java version "one.7.0_60" Coffee (TM) SE Run Time Environment (build 1.7.0_60-b19) Java Hotspot (TM) 64-fleck Server VM (build 24.60-b09,mixed way) |
| Linux | Open control terminal and blazon − $java -version | java version "ane.7.0_25" Open up JDK Runtime Environment (rhel-2.three.10.iv.el6_4-x86_64) Open JDK 64-Flake Server VM (build 23.7-b01, mixed style) |
-
We presume the readers of this tutorial have Java SDK version 1.7.0_60 installed on their organization.
-
In case y'all do non accept Java SDK, download its current version from https://www.oracle.com/technetwork/coffee/javase/downloads/index.html and have it installed.
Pace two: Ready your Java Environment
Prepare the environment variable JAVA_HOME to bespeak to the base directory location where Java is installed on your motorcar.
| S.No. | Platform & Description |
|---|---|
| 1 | Windows Set JAVA_HOME to C:\ProgramFiles\java\jdk1.7.0_60 |
| ii | Linux Export JAVA_HOME=/usr/local/java-current |
Suspend the full path of Java compiler location to the System Path.
| S.No. | Platform & Clarification |
|---|---|
| 1 | Windows Suspend the String "C:\Plan Files\Java\jdk1.7.0_60\bin" to the stop of the system variable PATH. |
| two | Linux Consign PATH=$PATH:$JAVA_HOME/bin/ |
Execute the command java -version from the command prompt every bit explained to a higher place.
Step three: Download Maven archive
Download Maven iii.iii.3 from https://maven.apache.org/download.cgi
| Bone | Archive name |
|---|---|
| Windows | apache-maven-three.3.3-bin.null |
| Linux | apache-maven-three.3.3-bin.tar.gz |
| Mac | apache-maven-three.3.iii-bin.tar.gz |
Stride 4: Extract the Maven annal
Excerpt the archive, to the directory you wish to install Maven iii.3.iii. The subdirectory apache-maven-3.iii.3 will be created from the archive.
| Bone | Location (can be unlike based on your installation) |
|---|---|
| Windows | C:\Programme Files\Apache Software Foundation\apache-maven-3.3.3 |
| Linux | /usr/local/apache-maven |
| Mac | /usr/local/apache-maven |
Step 5: Prepare Maven environment variables
Add M2_HOME, M2 and MAVEN_OPTS to the surround variables.
| Bone | Output |
|---|---|
| Windows | Set the surroundings variables using arrangement properties. M2_HOME=C:\Program Files\Apache Software Foundation\apache-maven-3.3.3 M2=%M2_HOME%\bin MAVEN_OPTS=-Xms256m -Xmx512m |
| Linux | Open command terminal and set surroundings variables. export M2_HOME=/usr/local/apache-maven/apache-maven-3.three.three export M2=$M2_HOME/bin export MAVEN_OPTS=-Xms256m -Xmx512m |
| Mac | Open control final and set environment variables. export M2_HOME=/usr/local/apache-maven/apache-maven-iii.three.3 consign M2=$M2_HOME/bin export MAVEN_OPTS=-Xms256m -Xmx512m |
Stride 6: Add together Maven bin directory location to the system path
Now append M2 variable to the System Path.
| Bone | Output |
|---|---|
| Windows | Append the cord ;%M2% to the end of the system variable, Path. |
| Linux | consign PATH=$M2:$PATH |
| Mac | export PATH=$M2:$PATH |
Step 7: Verify Maven installation
Now open the console, execute the following mvn control.
| Os | Task | Control |
|---|---|---|
| Windows | Open Command Console | c:\> mvn --version |
| Linux | Open Command Last | $ mvn --version |
| Mac | Open Concluding | car:< joseph$ mvn --version |
Finally, verify the output of the above commands, which should be something equally shown beneath −
| Os | Output |
|---|---|
| Windows | Apache Maven iii.three.three (7994120775791599e205a5524ec3e0dfe41d4a06; 2022-04-22T17:27:37+05:30) Maven home: C:\Plan Files\Apache Software Foundation\apache-maven-3.3.three Java version: 1.7.0_75, vendor: Oracle Corporation Coffee dwelling: C:\Programme Files\Coffee\jdk1.seven.0_75\jre Default locale: en_US, platform encoding: Cp1252 |
| Linux | Apache Maven three.3.3 (7994120775791599e205a5524ec3e0dfe41d4a06; 2022-04-22T17:27:37+05:thirty) Maven habitation: /usr/local/apache-maven/apache-maven-3.three.3 Java version: 1.7.0_75, vendor: Oracle Corporation Coffee dwelling: /usr/local/coffee-electric current/jdk1.7.0_75/jre |
| Mac | Apache Maven 3.three.3 (7994120775791599e205a5524ec3e0dfe41d4a06; 2022-04-22T17:27:37+05:30) Maven home: /usr/local/apache-maven/apache-maven-3.3.3 Java version: 1.seven.0_75, vendor: Oracle Corporation Java home: /Library/Coffee/Dwelling house/jdk1.seven.0_75/jre |
Stride viii: Setup Eclipse IDE
All the examples in this tutorial have been written using the Eclipse IDE. It is recommended that the readers should take the latest version of Eclipse installed on their machine. To install the Eclipse IDE, download the latest Eclipse binaries from the post-obit link https://www.eclipse.org/downloads/. Once the installation is downloaded, unpack the binary distribution into a convenient location.
For instance in C:\eclipse on windows, or /usr/local/eclipse on Linux/Unix and finally set the PATH variable accordingly. Eclipse tin be started past executing the following commands on the windows auto, or you tin simply double click on eclipse.exe.
%C:\eclipse\eclipse.exe
Eclipse can be started by executing the following commands on the UNIX (Solaris, Linux, etc.) machine −
$/usr/local/eclipse/eclipse
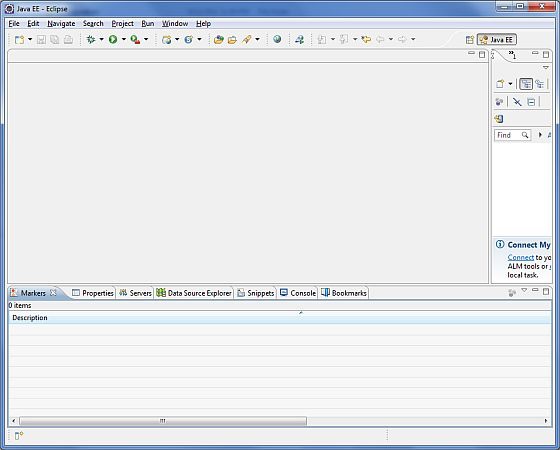
After a successful startup, if everything is fine and so it should display the following screen −
Step nine: Setup Apache Tomcat
We can download the latest version of Tomcat from https://tomcat.apache.org/. Once the installation is downloaded, unpack the binary distribution into a convenient location. For example in the C:\apache-tomcat-7.0.59 on a windows automobile, or in the /usr/local/apache-tomcat-7.0.59 on a Linux/Unix car and then set up the CATALINA_HOME environment variable pointing to the installation locations.
Tomcat can be started by executing the following commands on a windows machine, or you can simply double click on startup.bat
%CATALINA_HOME%\bin\startup.bat or C:\apache-tomcat-vii.0.59\bin\startup.bat
Tomcat can be started by executing the following commands on UNIX (Solaris, Linux, etc.) auto −
$CATALINA_HOME/bin/startup.sh or /usr/local/apache-tomcat-seven.0.59/bin/startup.sh
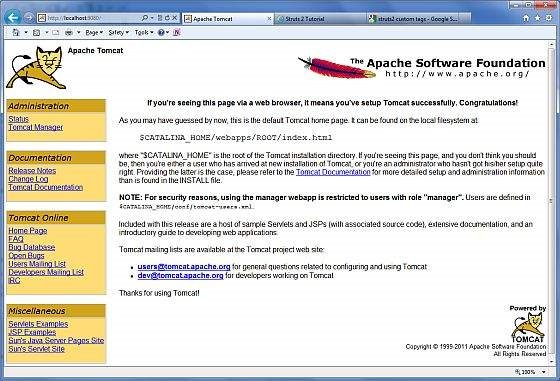
Later on a successful startup, the default web applications included with Tomcat will exist available by visiting – http://localhost:8080/. If everything is ok, and then it should display the following screen −
Further data about configuring and running Tomcat can be constitute in the documentation included here, as well equally on the Tomcat website − https://tomcat.apache.org
Tomcat can be stopped by executing the post-obit commands on a windows machine −
%CATALINA_HOME%\bin\shutdown or C:\apache-tomcat-7.0.59\bin\shutdown
Tomcat can be stopped by executing the following commands on the UNIX (Solaris, Linux, etc.) machine −
$CATALINA_HOME/bin/shutdown.sh or /usr/local/apache-tomcat-7.0.59/bin/shutdown.sh
One time we are done with this final step, we are ready to proceed for the first Web Services Example, which nosotros will discuss in the next chapter.

How To Set Jdk Path In Spring Tool Suite,
Source: https://www.tutorialspoint.com/springws/springws_environment_setup.htm
Posted by: goodwincrishere.blogspot.com
0 Response to "How To Set Jdk Path In Spring Tool Suite"
Post a Comment